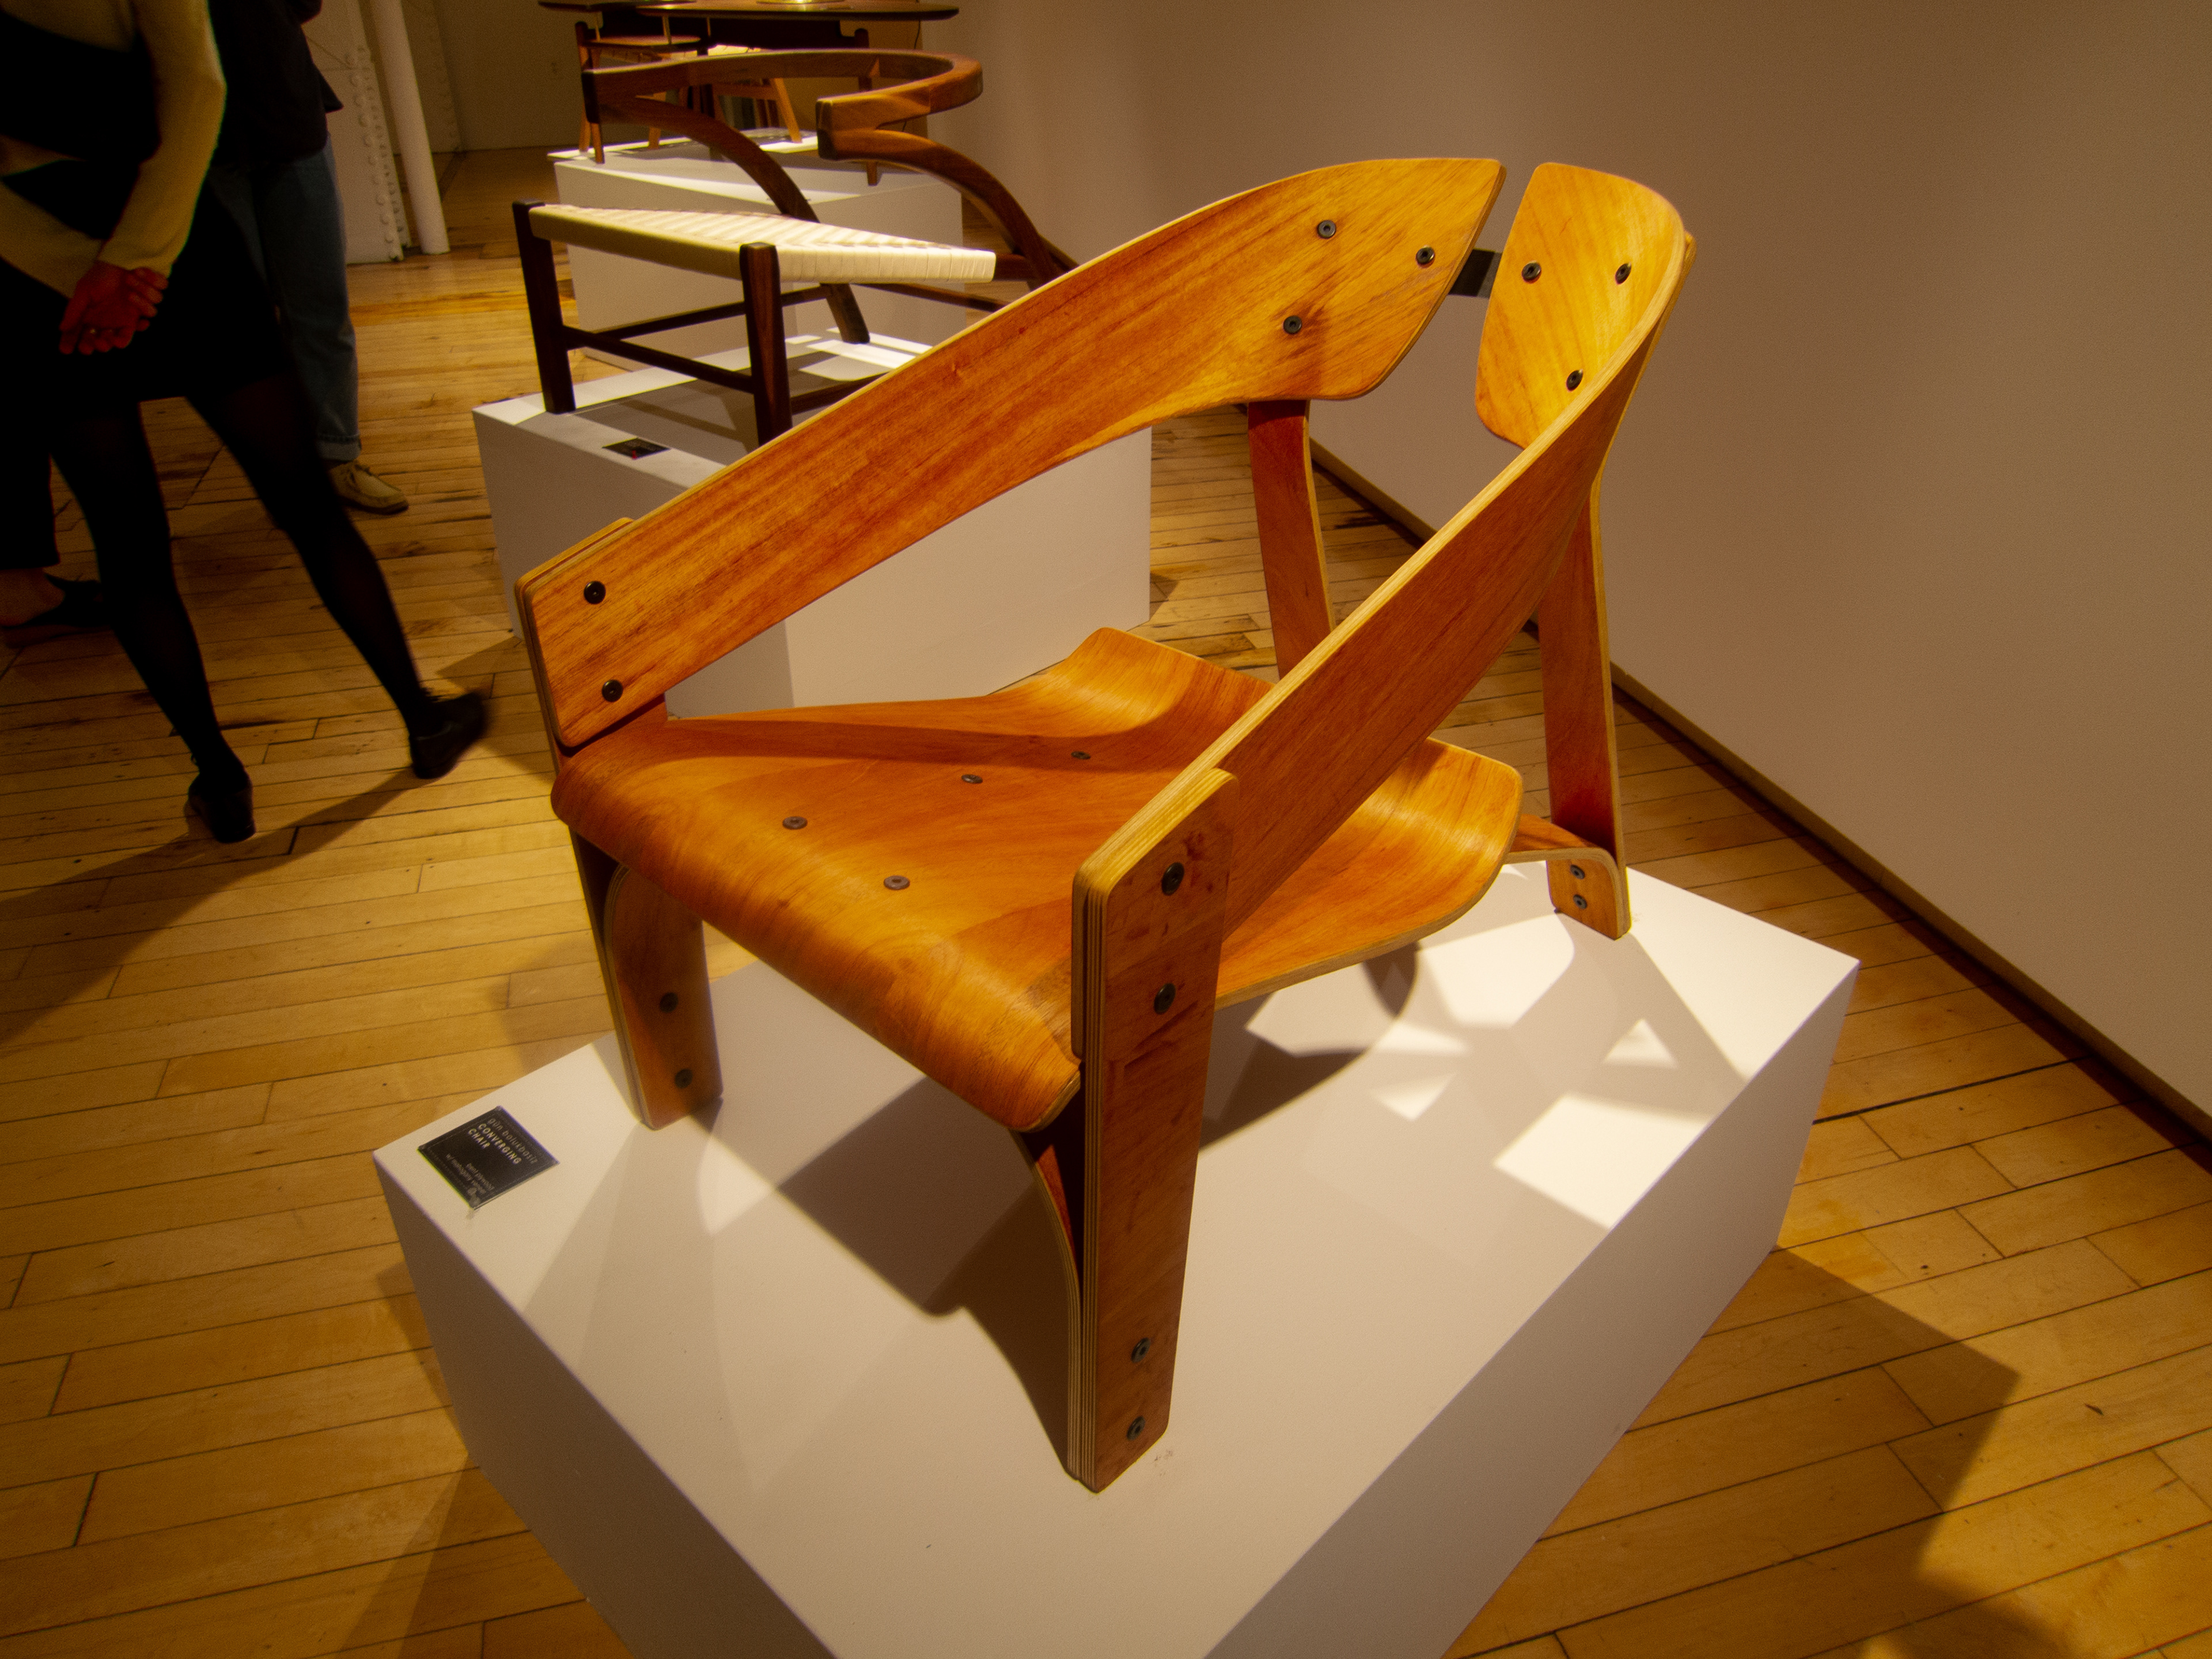

I made a bent lamination chair, where each piece holds a unique curve that results in a most comfortable and ergonomic chair. It is made up of 10 wood pieces and 3 metal fixtures.
It can be fully disassembled if needed, for ease of transporting, or replacing of parts.


The two large back pieces are connected with a "wishbone" style steel connector. The two bottom legs, which hold a lot of stress, were also reinforced with steel plates, to make the chair highly durable for stress.
inspiration
Every day, I doodle a lot of things. One of my favorites, to warm up my sketching left hand, is abstract compositions of curves and lines.
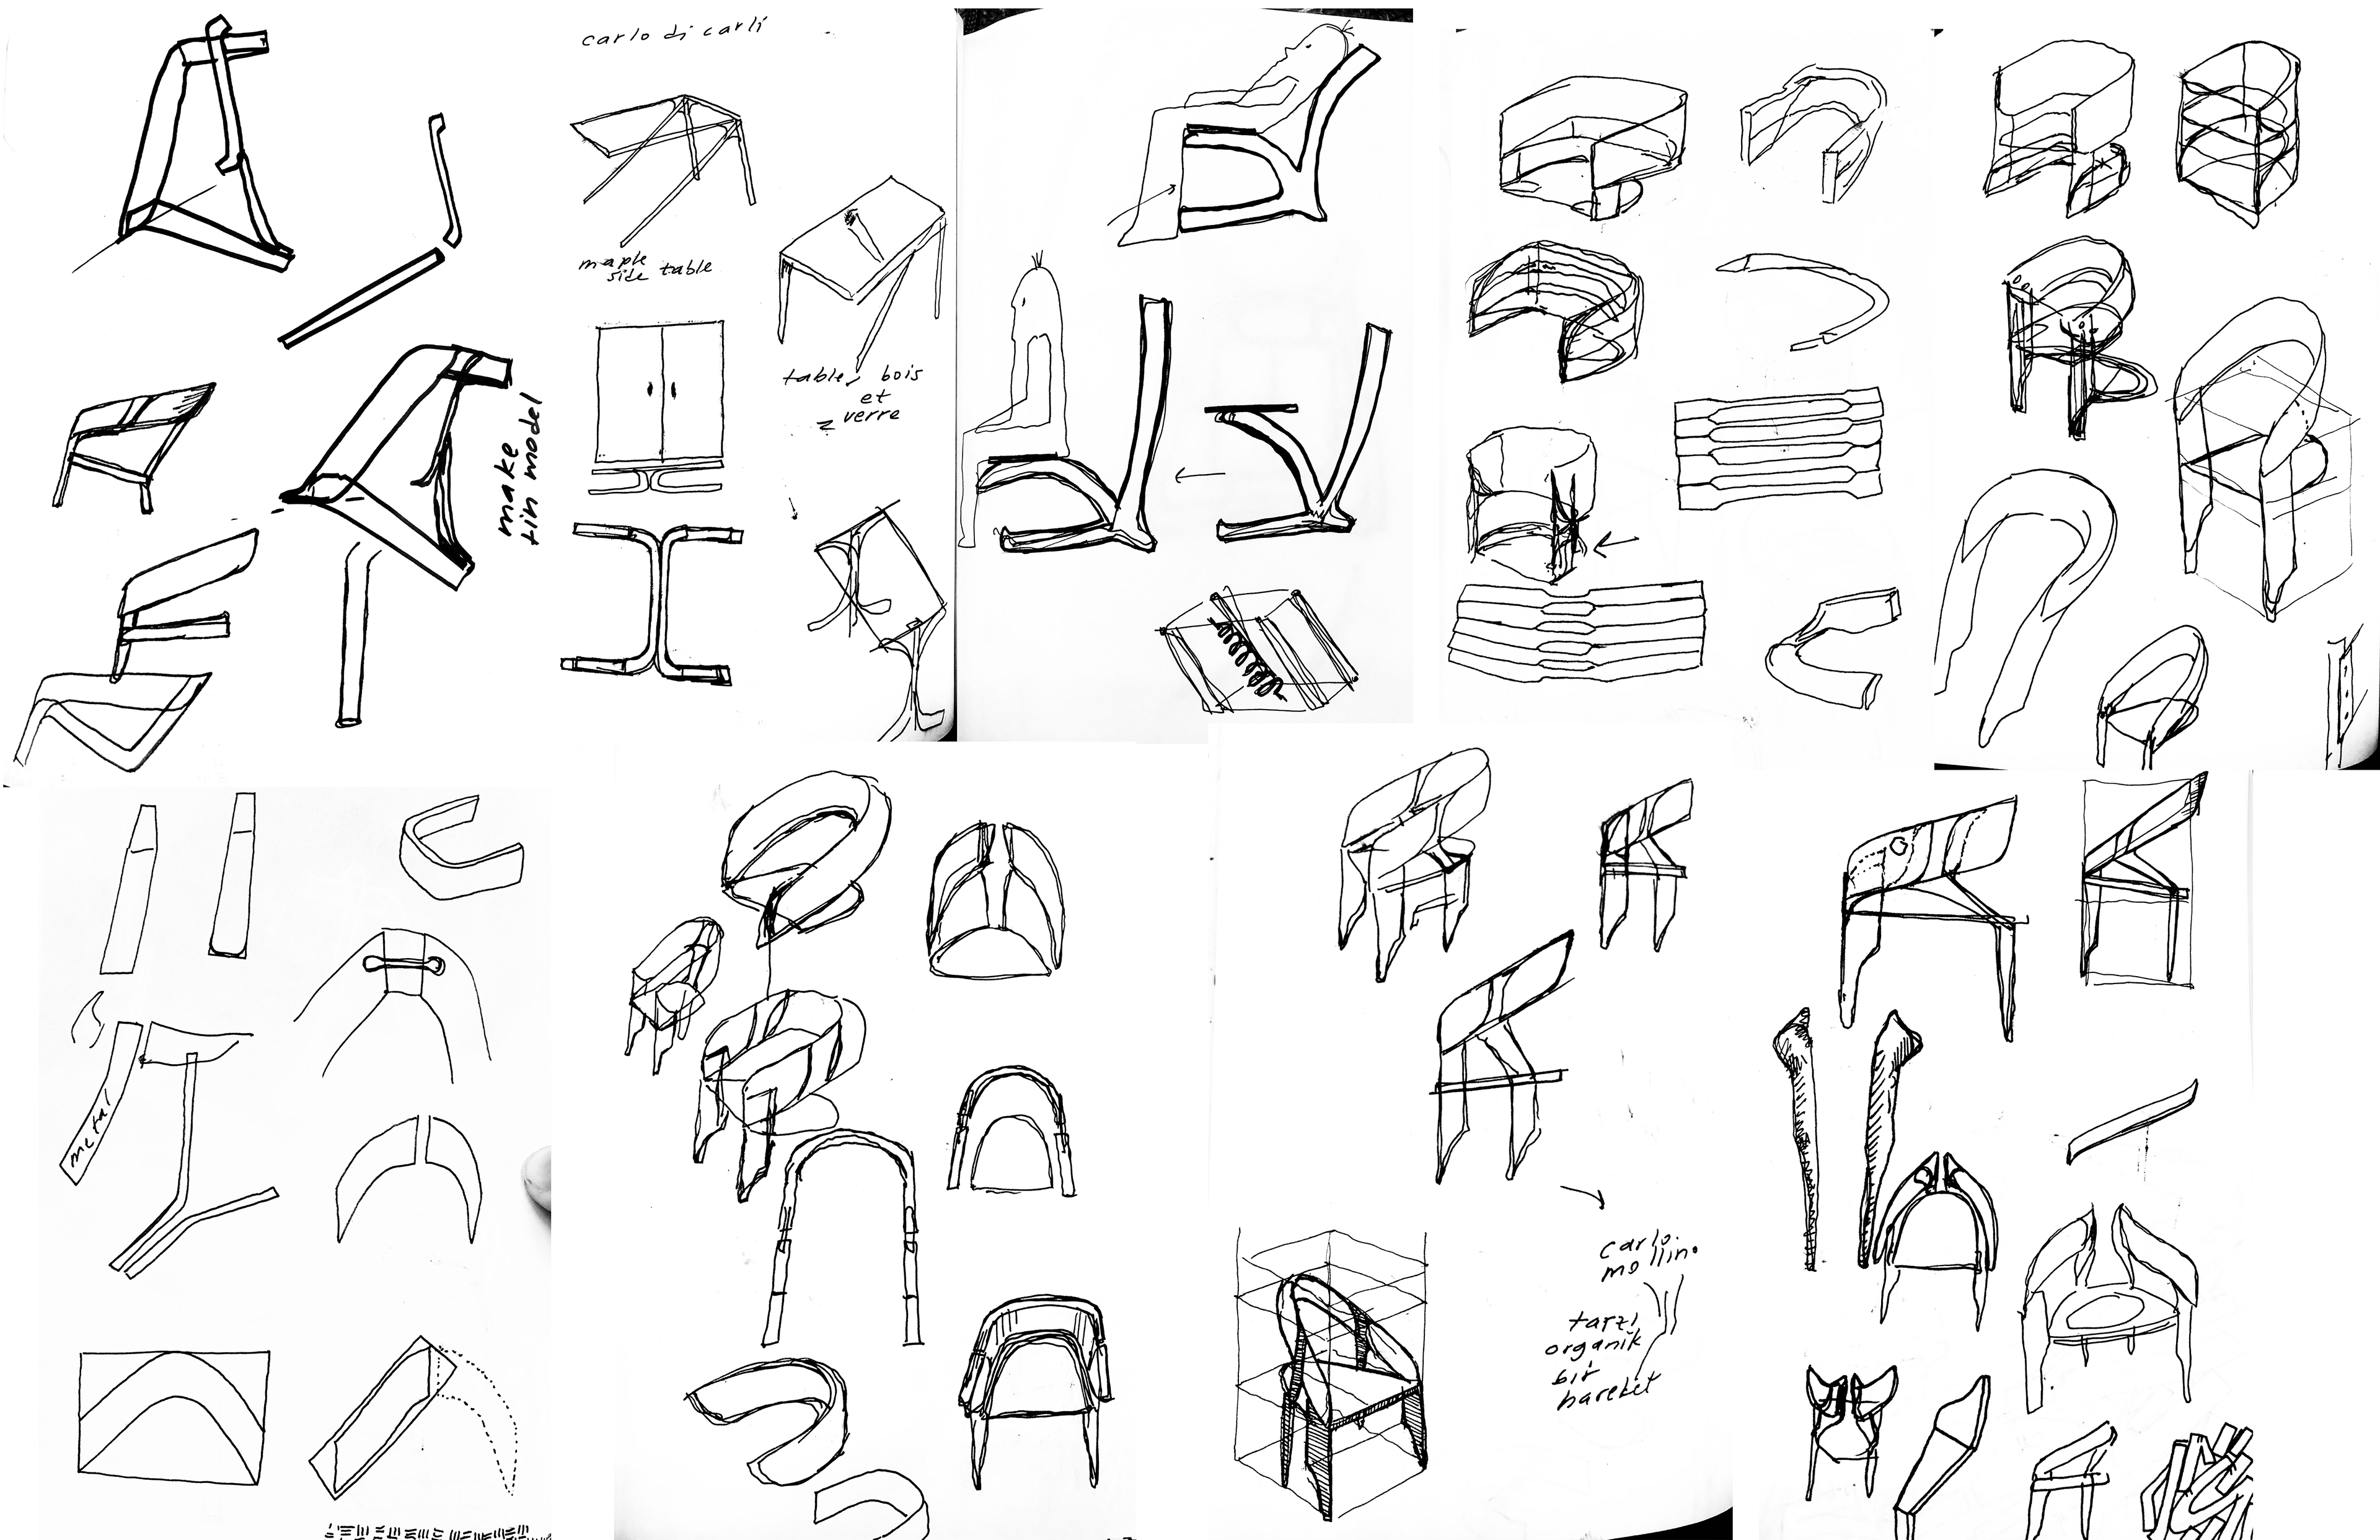
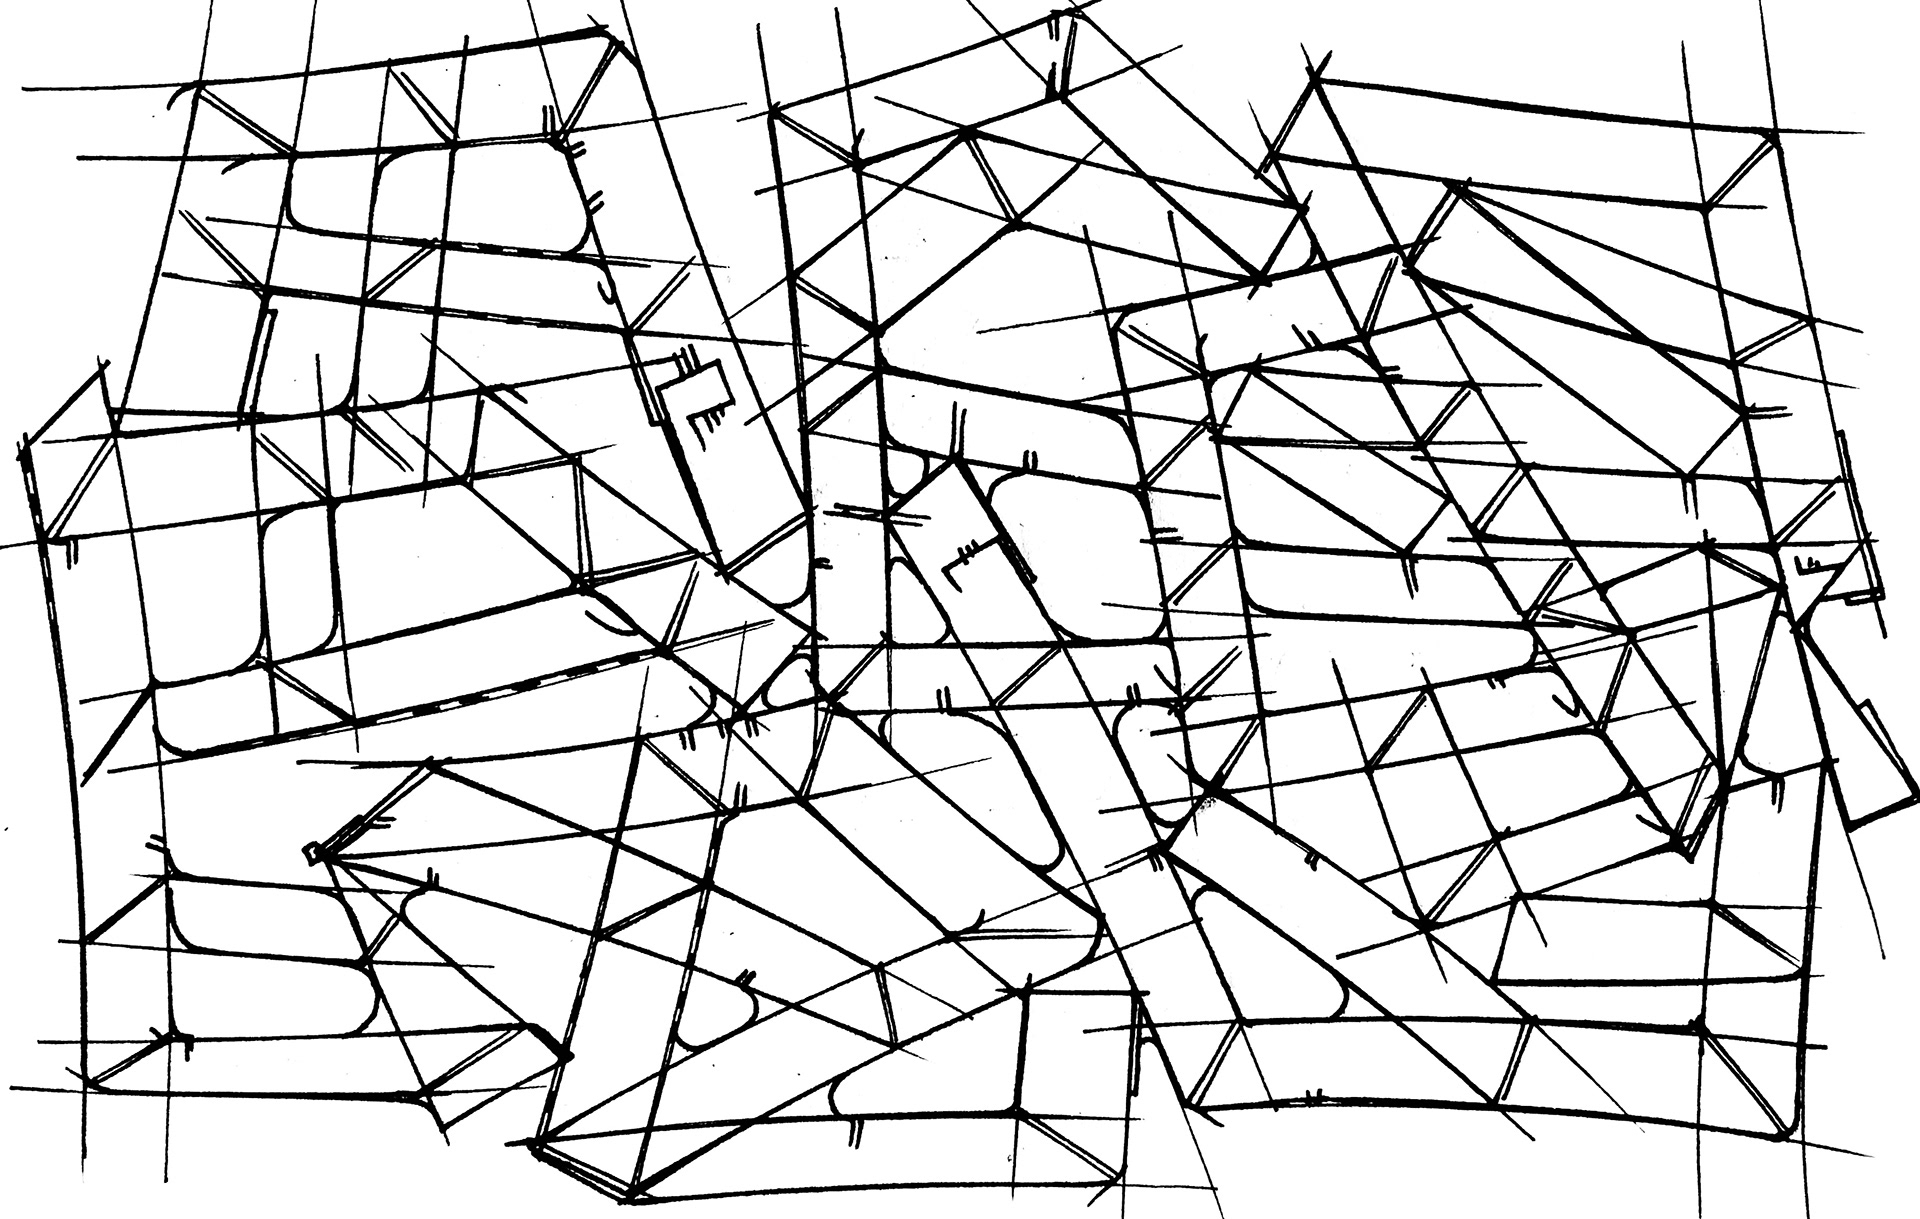
Image showing initial, rough sketches and quick ideation process, exploring a design that is industrially applicable and efficient, yet organic and human in its curves.
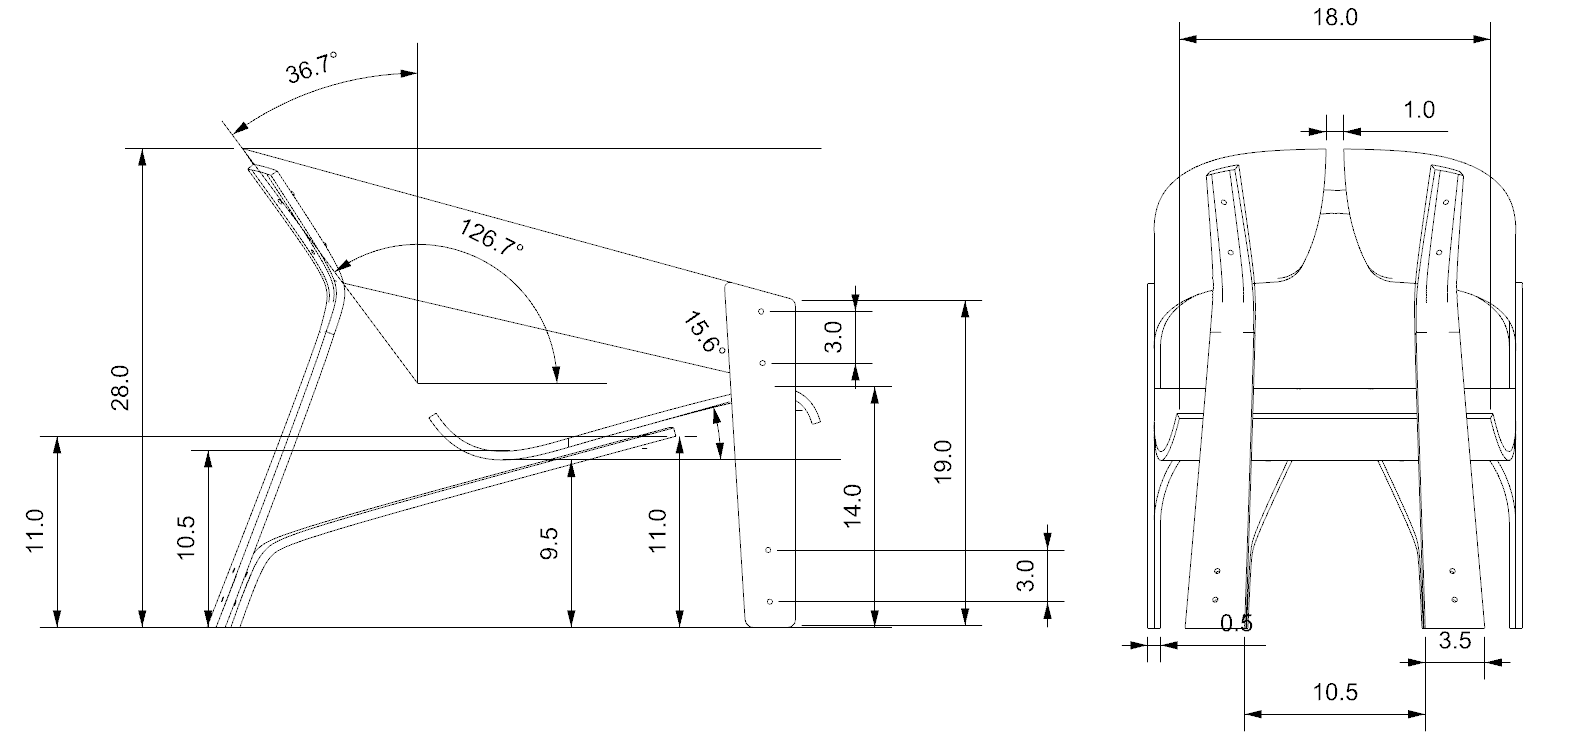
The orthographic drawing on the left, demonstrates the carefully selected angles for an ergonomic lounge chair, referencing the ergonomics studies of Henry Dreyfuss, "Human Factors in Design".
process
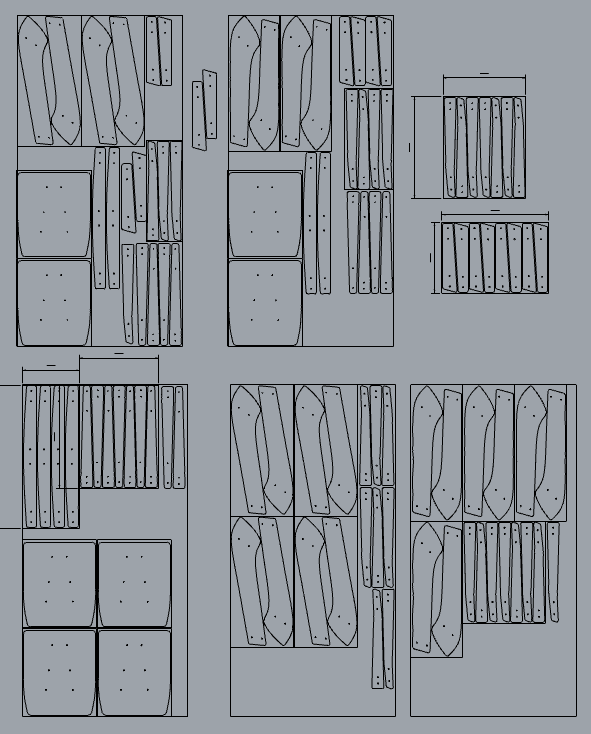
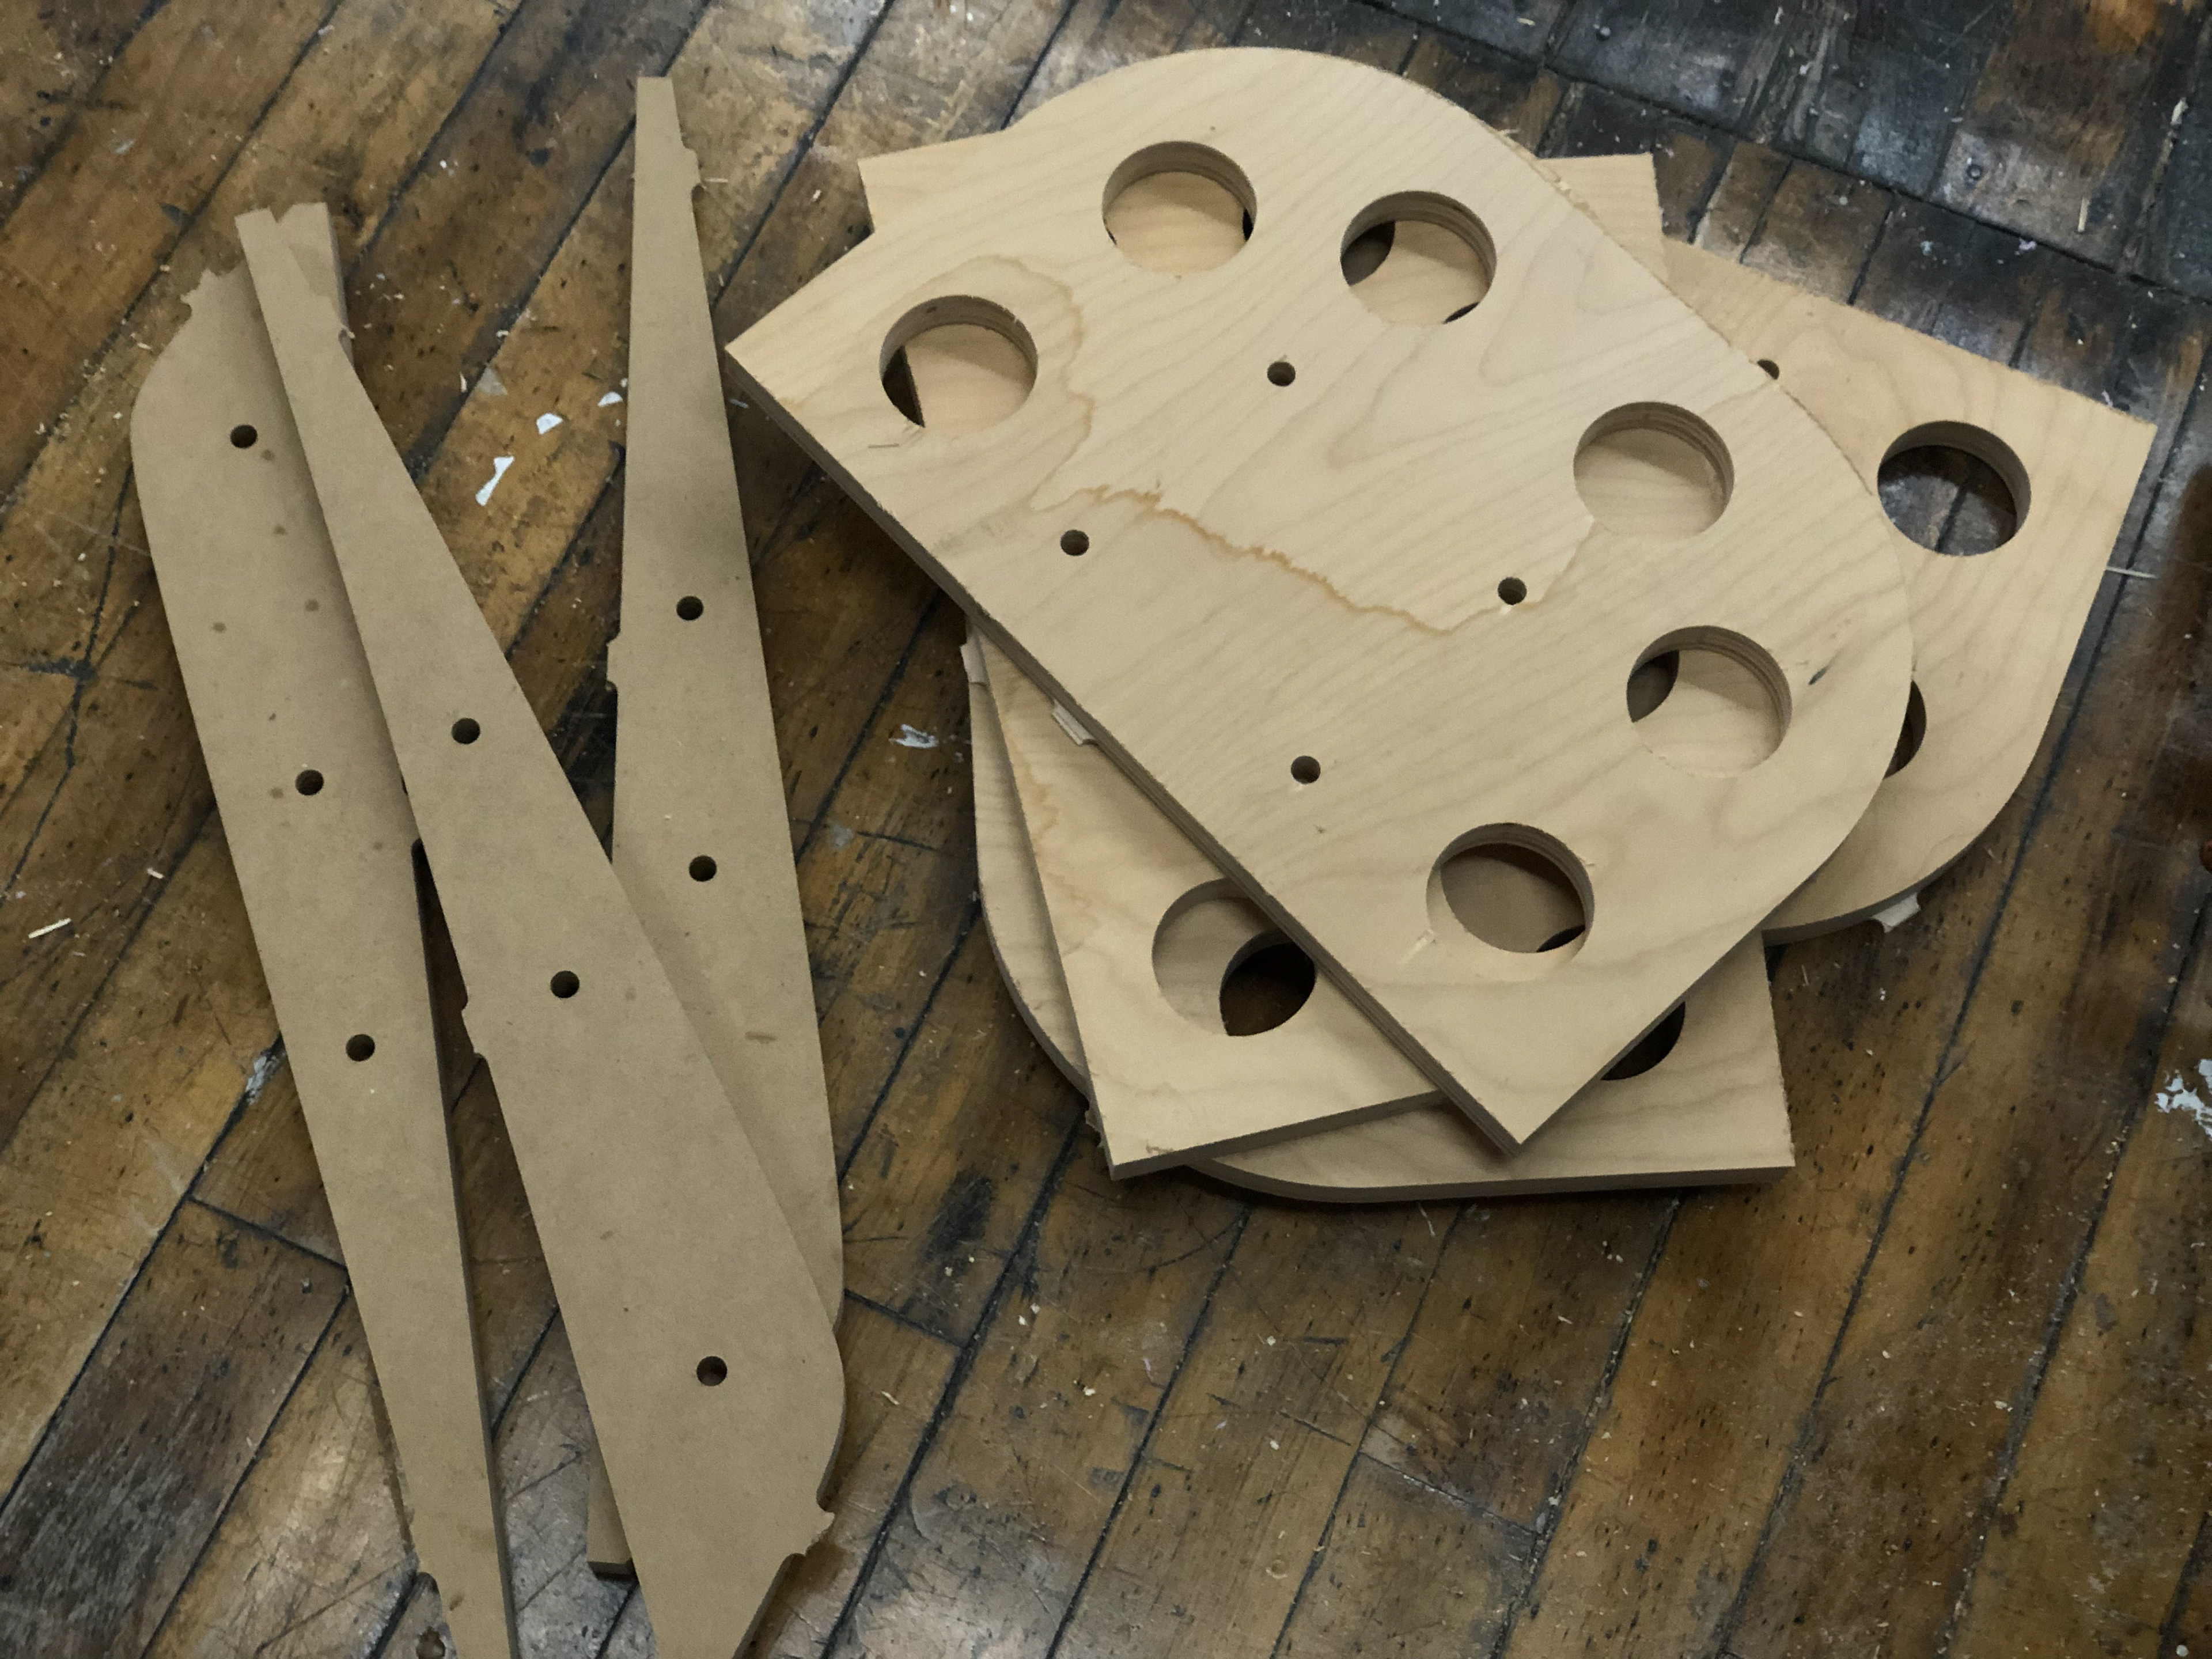
Beginning the fabrication process, I began extensively planning out my process using CAD, where I created templates for the bending plywood to be laser cut into exact geometry.
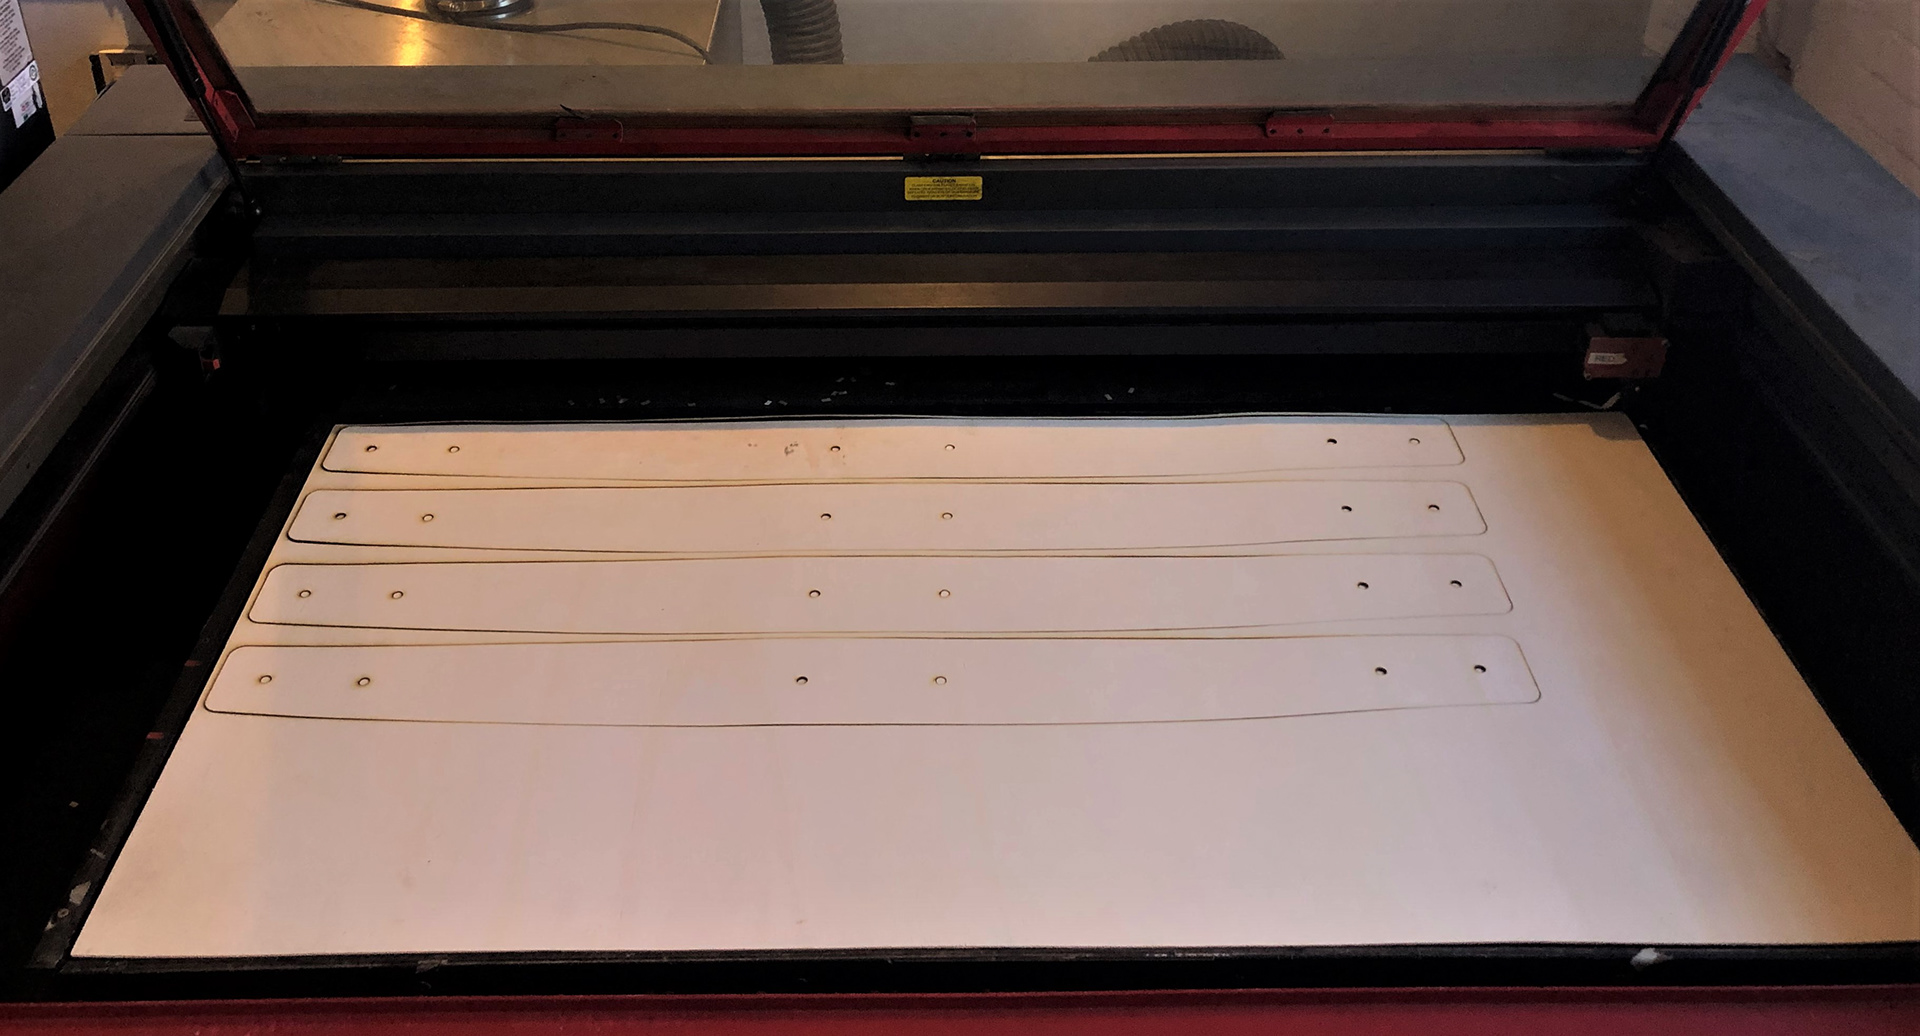
Image showing the laser cutting process of each lamination piece.
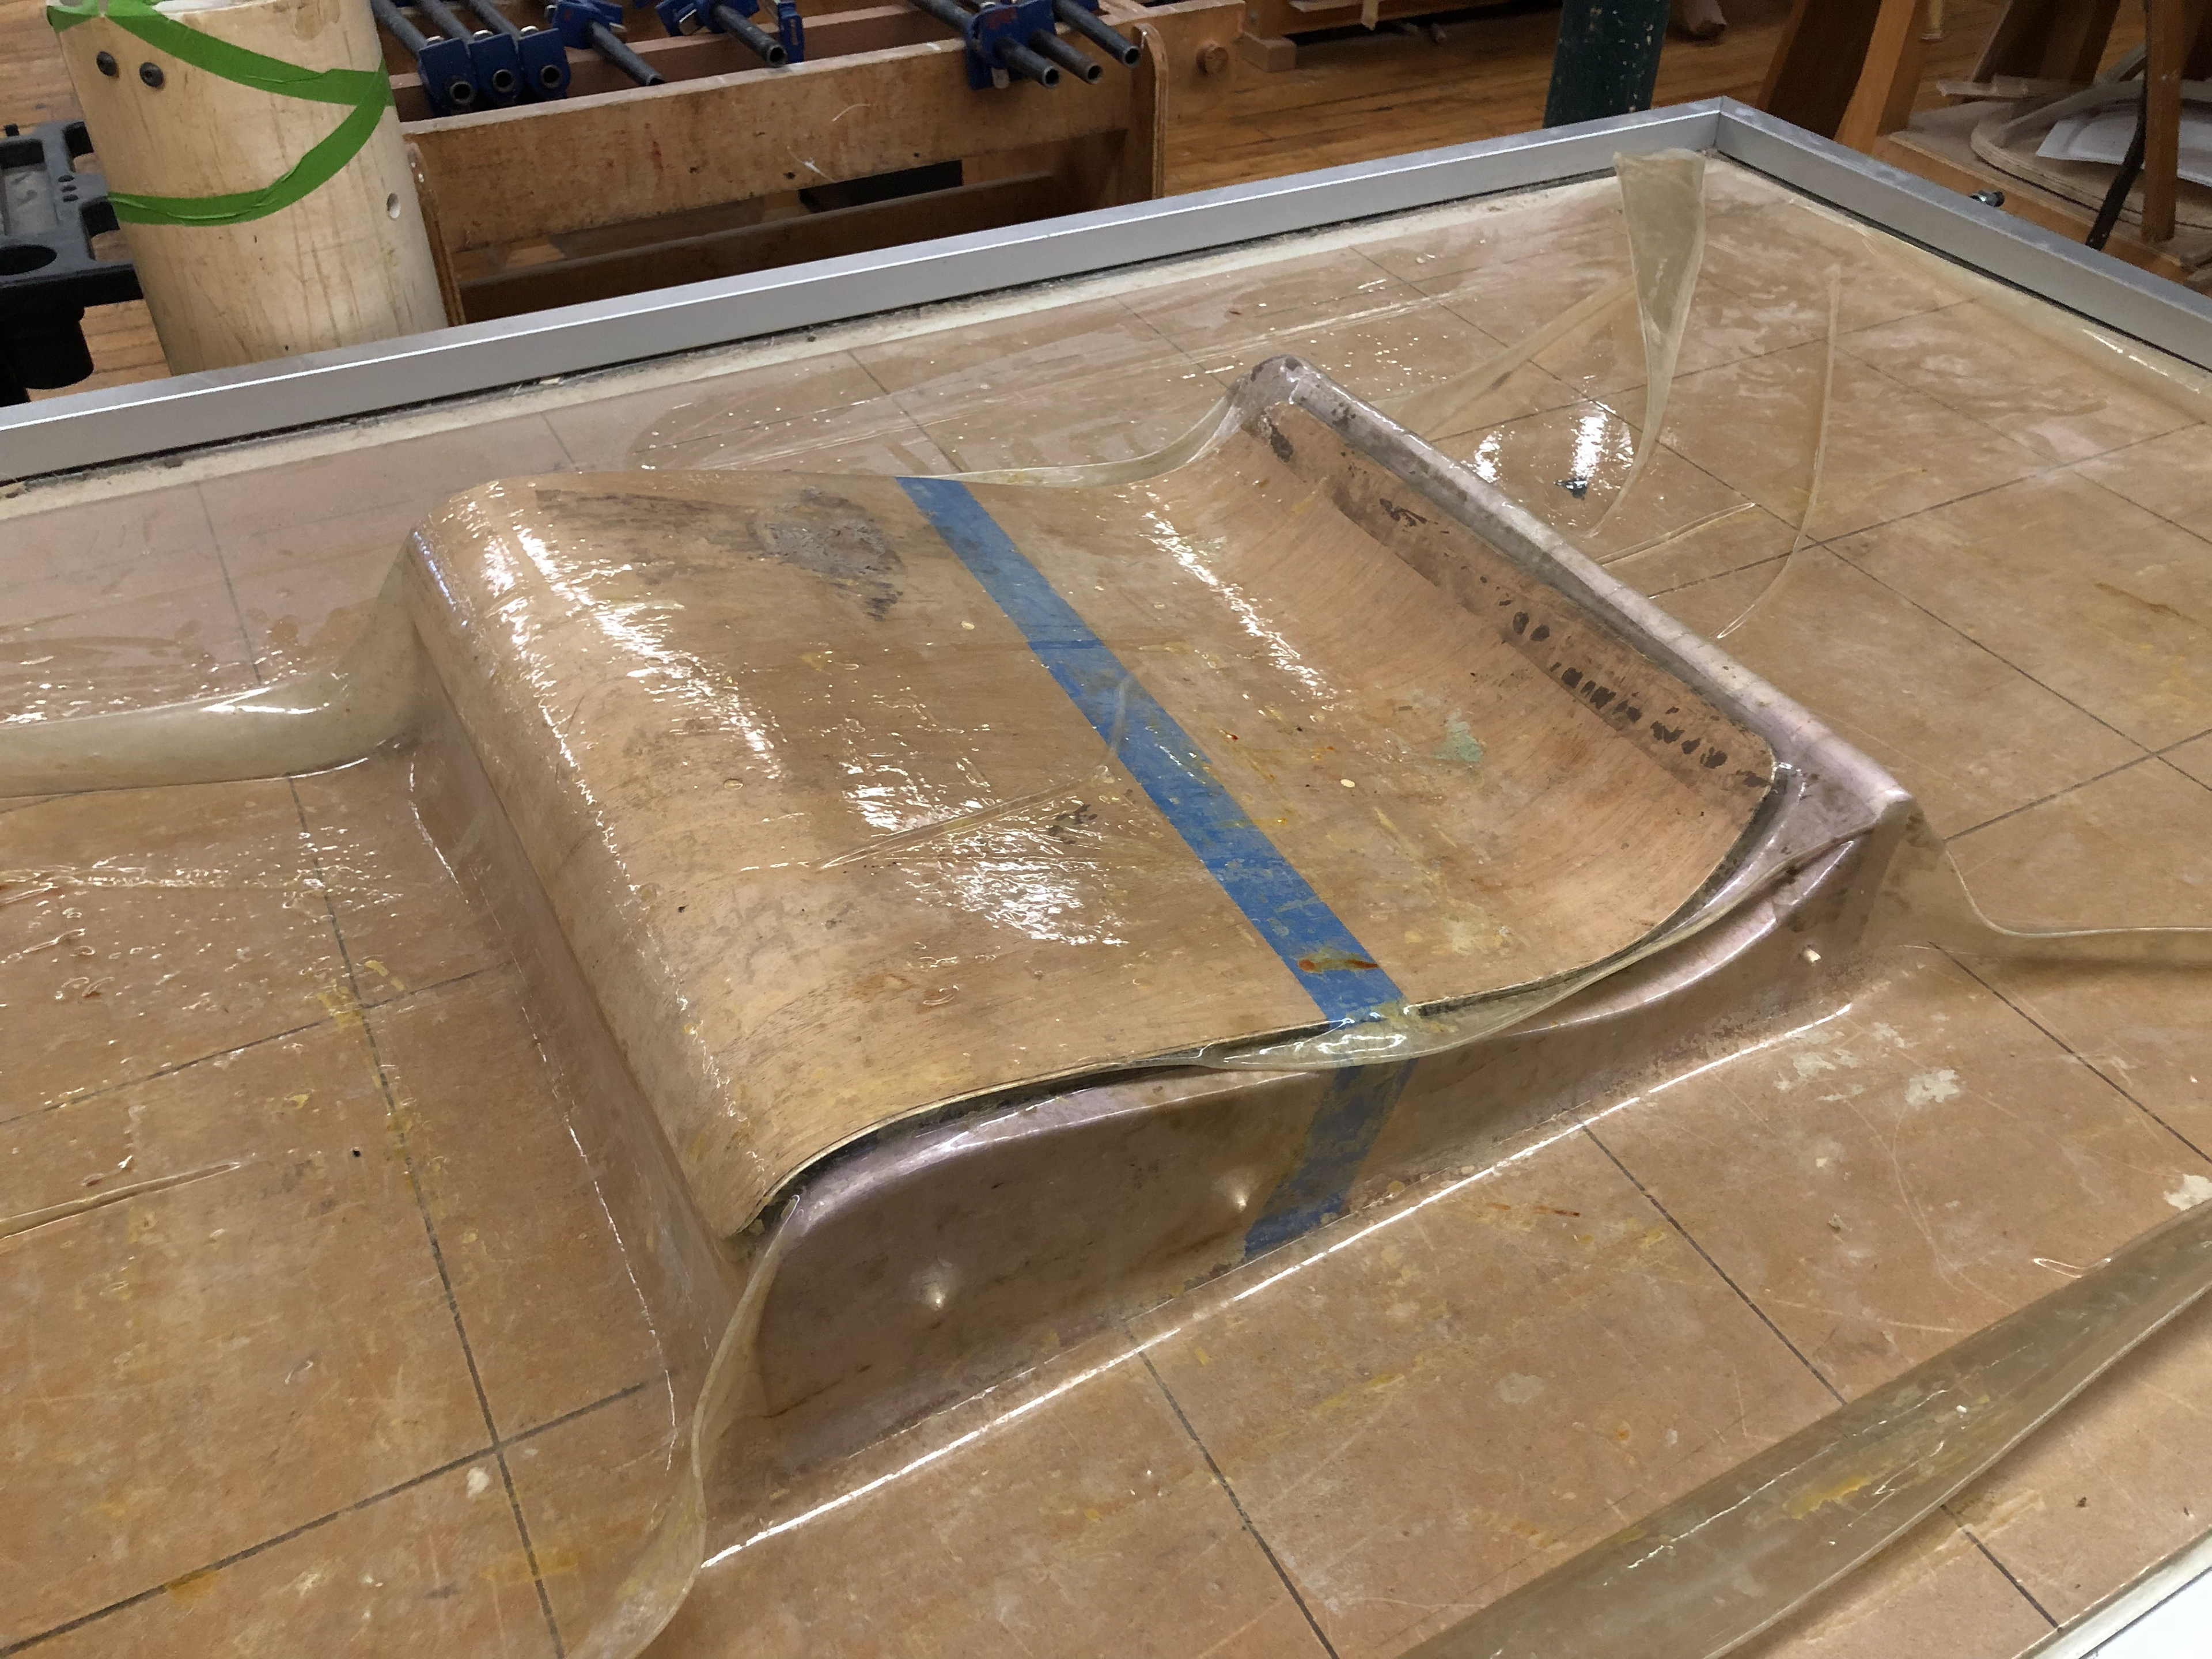
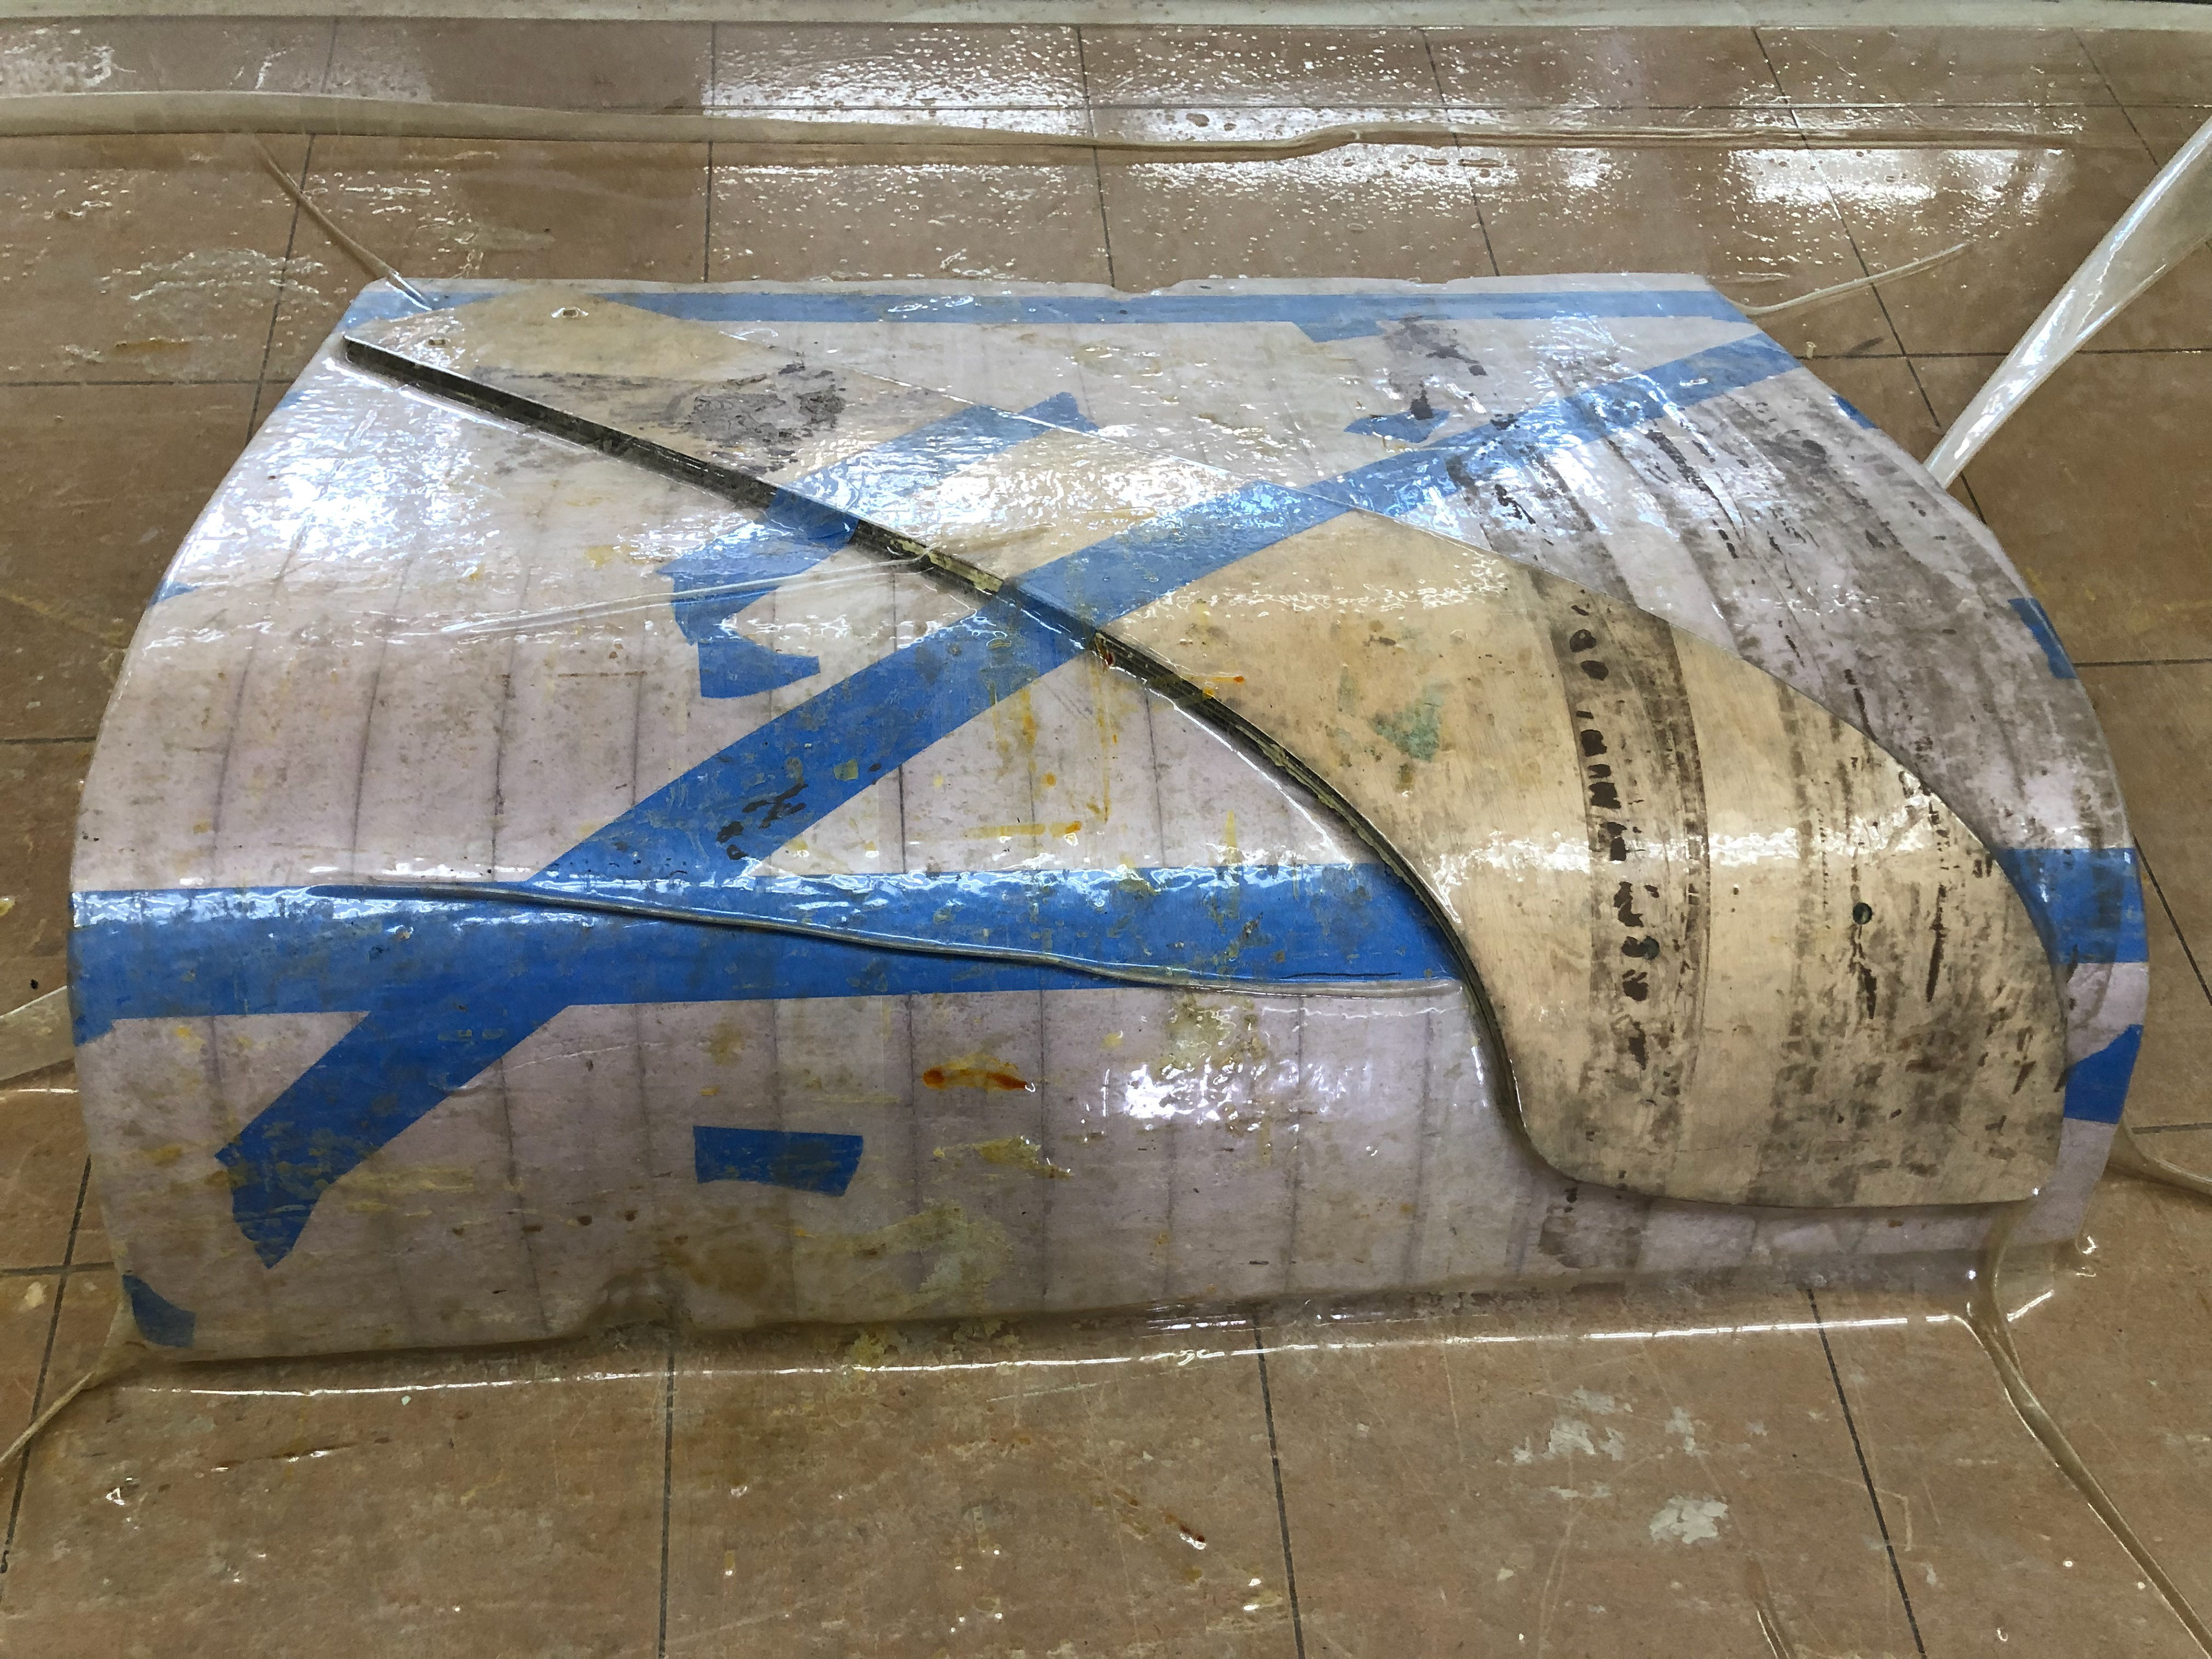
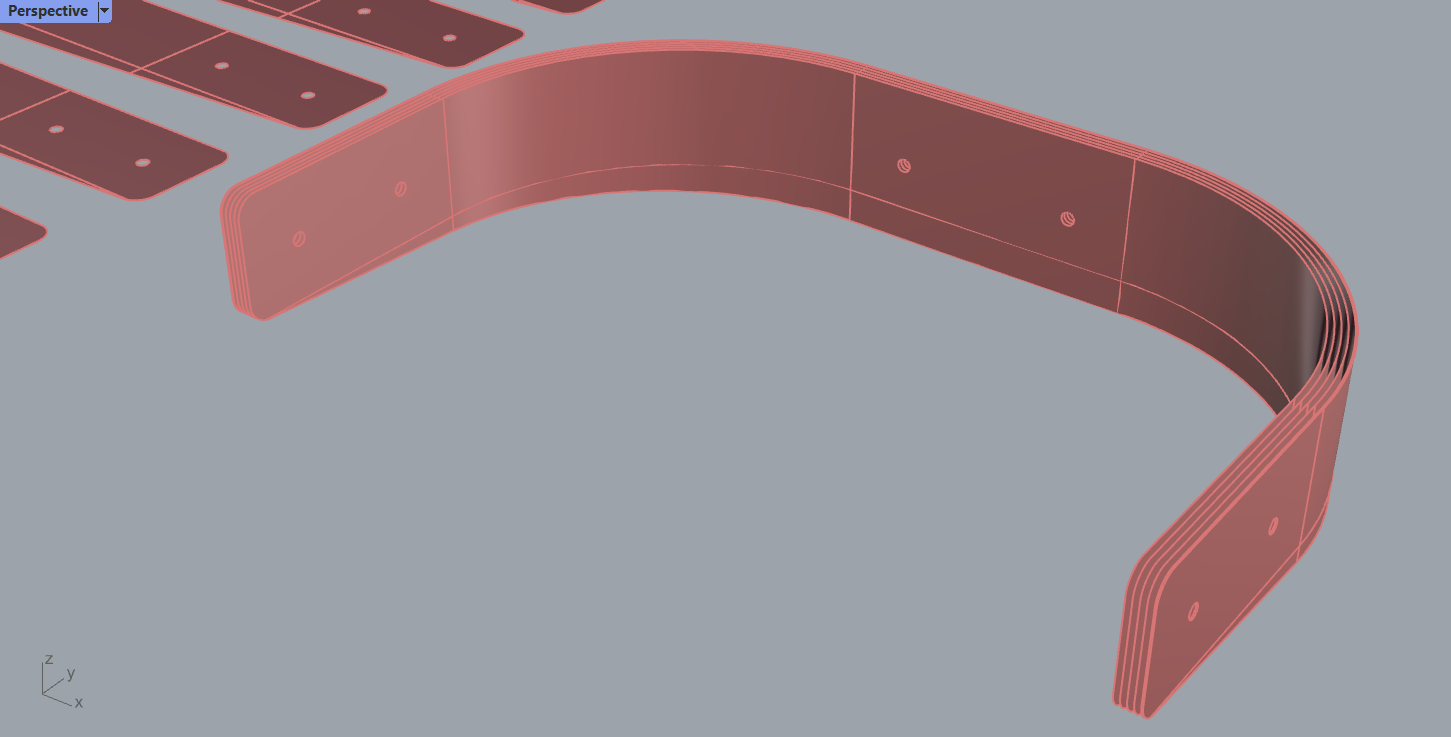
Two images above demonstrate how the wood was bent using a vacuum table. After the glue between each layer of lamination dries, the 3-dimensional curve of the pieces is set and the pieces hold their integrity.
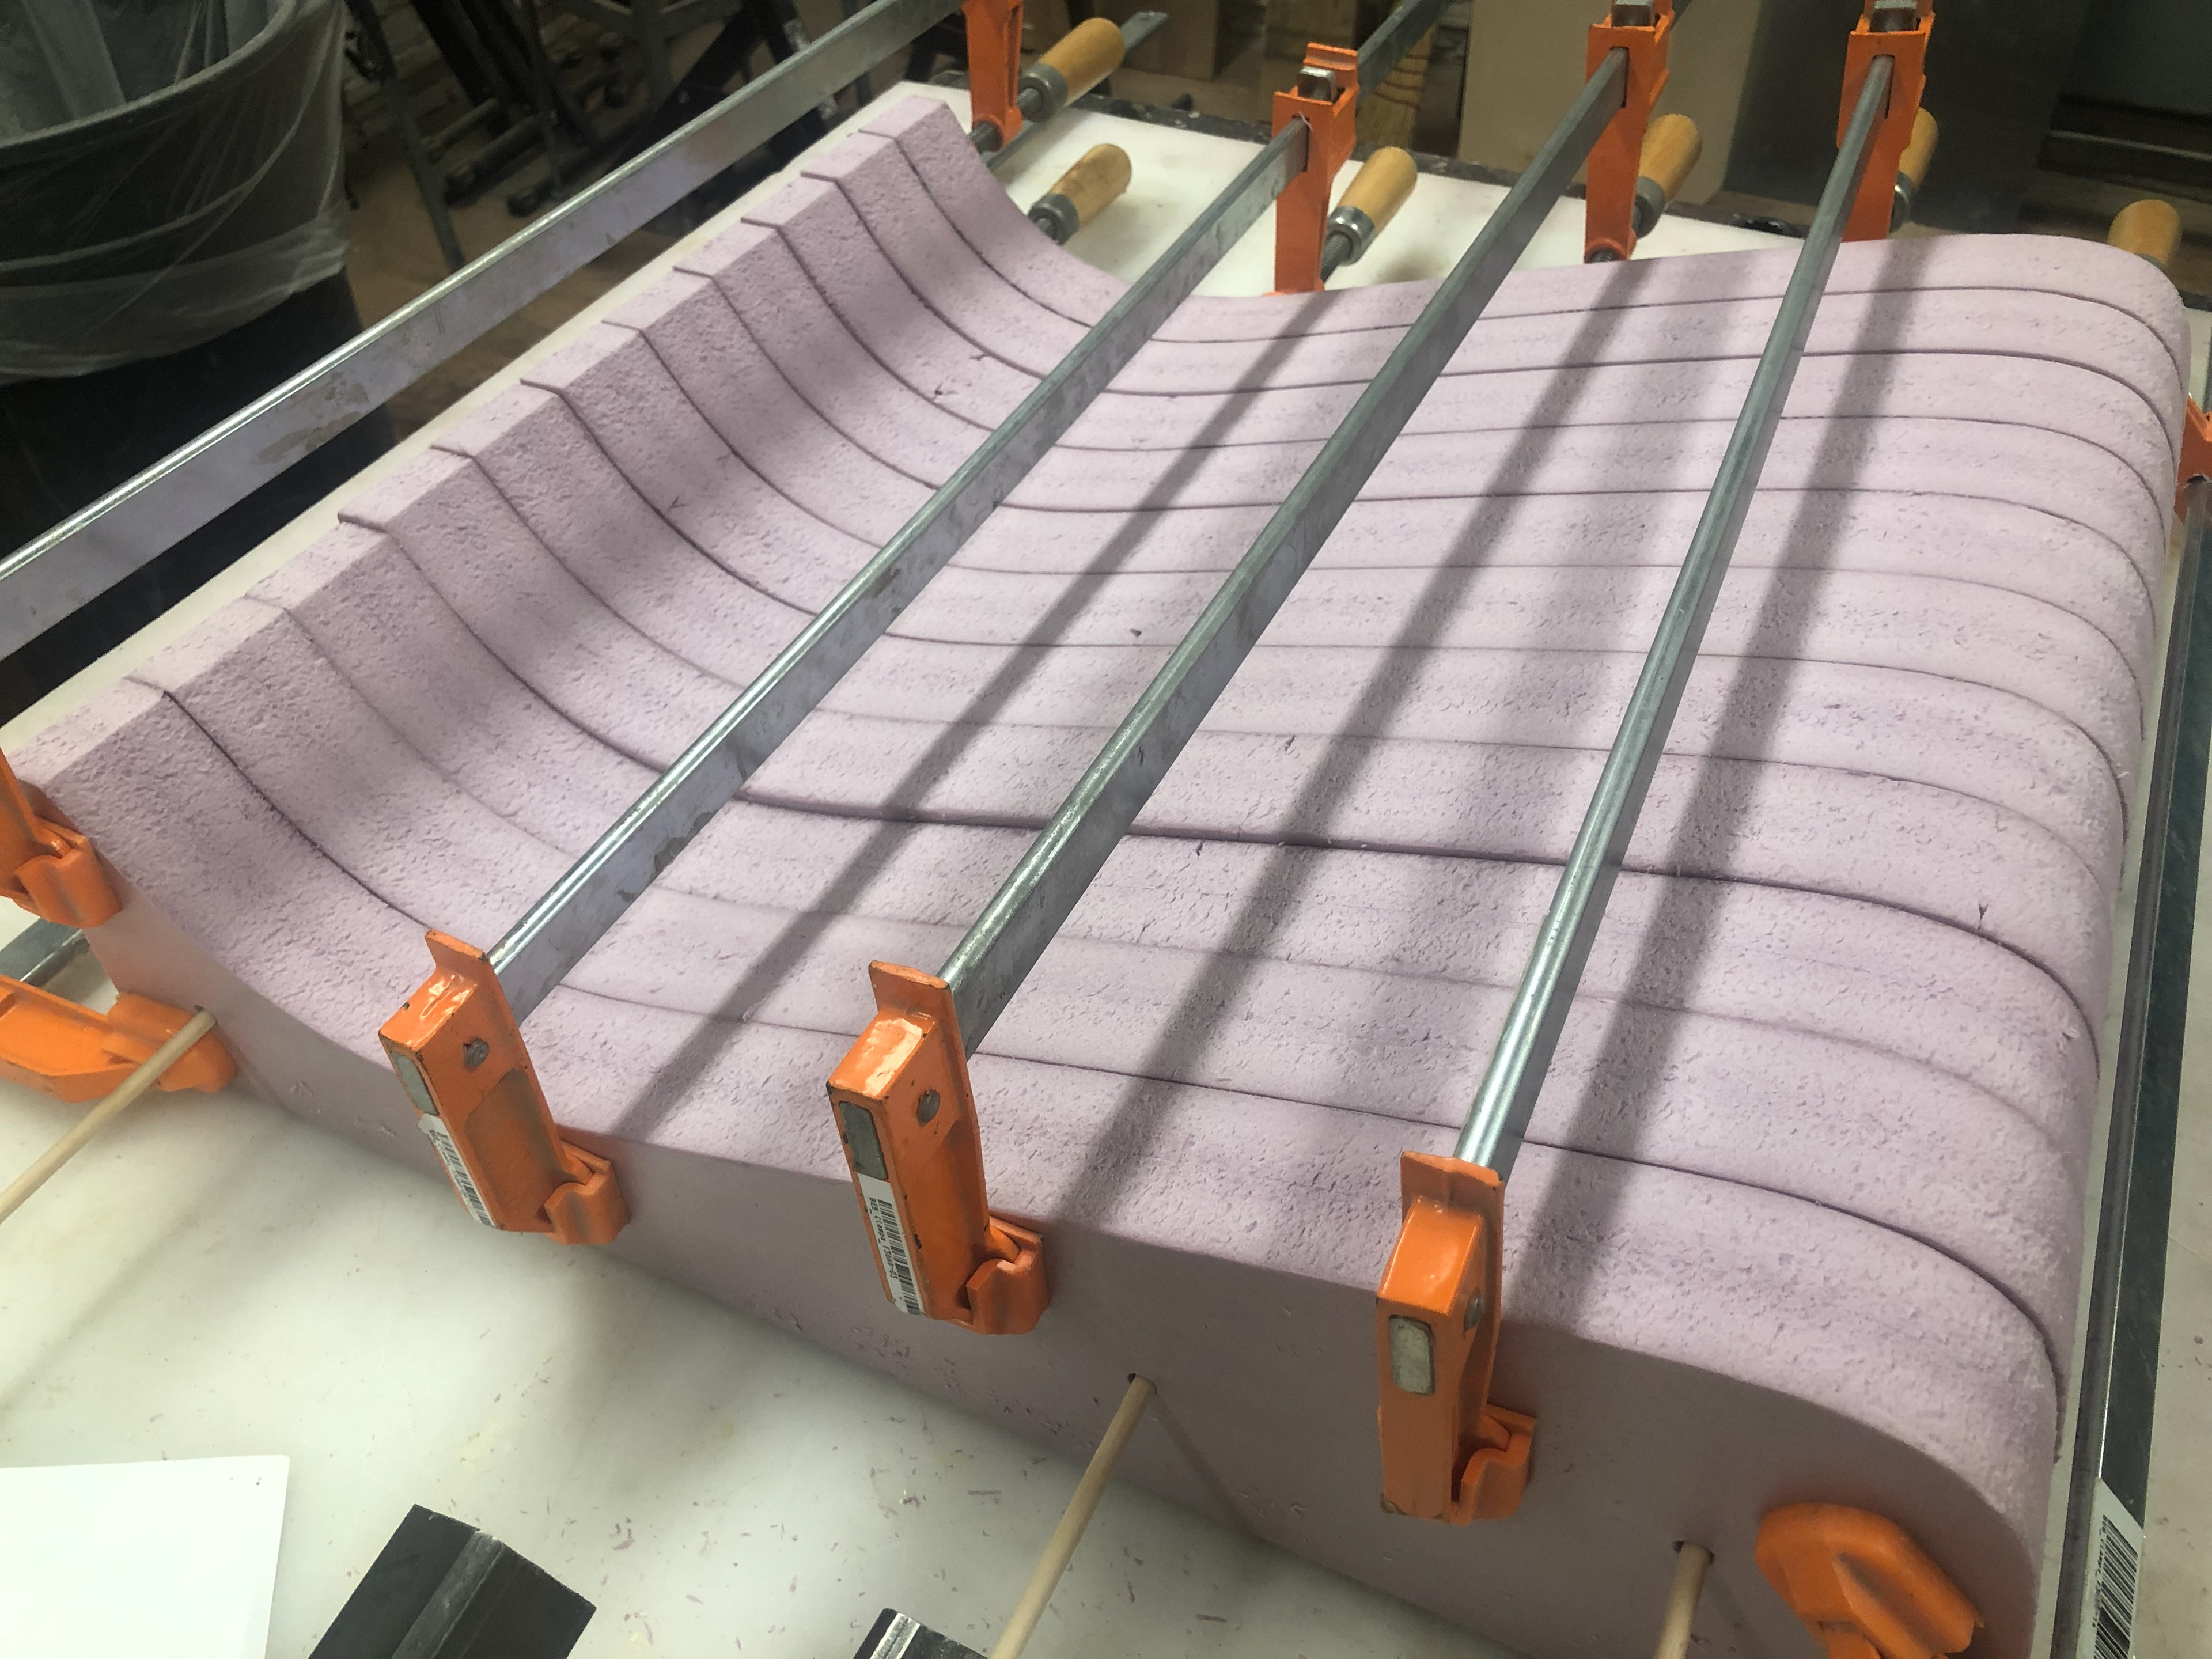
The construction of jigs to mold the lamination pieces in the vacuum table.